


Before you even think about drilling holes, remember that a great split system installation is all about smart planning. This isn't just about putting a box on the wall; it's about picking the right system and the perfect spot to ensure years of efficient, reliable comfort. Getting this stage right is easily the most important step in the entire process.
Your Essential Checklist Before Installation

A successful split system installation starts long before the tools come out. Proper planning means you invest in a unit that genuinely matches your home’s needs, saving you from nasty power bills and poor performance down the track. This is especially true across NSW, from the humid coastal suburbs of the Central Coast to the dry heat of Sydney's western suburbs and the temperature swings of the Hunter Valley.
Every home has its own unique thermal personality. For instance, a modern apartment in Newcastle with double-glazed windows and decent insulation will have wildly different cooling needs compared to an older weatherboard house in Cessnock with high ceilings. That’s why we always start with a thorough look at your space.
Correctly Sizing Your Air Conditioner
One of the most common mistakes we see homeowners make is thinking bigger is always better. It’s not. An oversized unit will switch on and off too frequently, a process we call "short cycling." This not only fails to properly dehumidify the air, creating a clammy, uncomfortable room, but it also chews through energy and puts unnecessary strain on the system's parts.
On the flip side, an undersized unit will run constantly, struggling to hit the set temperature on a hot day. This leads to massive power bills and a much shorter lifespan for your air conditioner. Finding that ‘just right’ balance is the key to both comfort and efficiency. Our detailed guide on what size split system you need dives deeper into the calculation process.
The ideal capacity, measured in kilowatts (kW), comes down to a few key factors:
- Room Dimensions: The total square metres and ceiling height of the area you want to cool or heat.
- Window Orientation: North and west-facing windows let in a huge amount of heat, especially in the afternoon.
- Insulation: The quality of your ceiling and wall insulation plays a massive role in how well your home holds its temperature.
- Local Climate: A home in Gosford (postcode 2250) dealing with coastal humidity has different needs than a home facing the dry heat of the Hunter Valley.
To give you a starting point, here’s a quick reference for matching room size to system capacity.
Quick Guide to Split System Sizing
This table offers a simplified guide to help you estimate the right air conditioner size (kW) for your room, assuming average Australian ceiling heights. Remember, factors like window size and insulation can change the final recommendation.
| Room Size (Square Metres) | Recommended Capacity (kW) | Best Suited For |
|---|---|---|
| 10–20 m² | 2.0–2.5 kW | Small bedrooms, home offices, or studies |
| 20–35 m² | 3.5–5.0 kW | Larger bedrooms, small living rooms, or dining areas |
| 35–60 m² | 6.0–7.1 kW | Main living areas, open-plan kitchen/dining spaces |
| 60–80 m² | 8.0–9.4 kW | Large open-plan living areas, small commercial spaces |
This is a great starting point, but a professional assessment will always give you the most accurate sizing for your specific space.
Reverse Cycle or Cooling Only?
Another crucial decision is whether you need a reverse cycle model or a cooling-only unit. Reverse cycle systems are incredibly popular in NSW because they provide both heating and cooling from a single, energy-efficient unit. They’re perfect for year-round comfort, especially in places like the Hunter Valley which gets both scorching summers and chilly winter mornings.
Cooling-only models can be a slightly more budget-friendly option if you already have a reliable heating solution you’re happy with.
High-efficiency units are becoming the standard, partly thanks to government initiatives. In NSW, the Energy Savings Scheme (ESS) has encouraged thousands of homeowners to upgrade. In fact, a 2022 report highlighted that over 18,000 high-efficiency air conditioners were installed with support from these incentives, which help manage the upfront supply and installation costs that typically range from $2,500 to $5,000.
Why Professional Installation is Non-Negotiable
You might be tempted to save a few dollars by trying a DIY installation or hiring an unlicensed handyperson. Let's be crystal clear: this is one of the riskiest things you can do for your home. In Australia, installing a split system air conditioner isn't a weekend warrior job. It involves both restricted electrical work and handling regulated refrigerant gases, which makes professional installation a legal requirement, not just a friendly suggestion.
Trying this work without the right licences is straight-up illegal and dangerous. It instantly voids your manufacturer's warranty, leaving you high and dry if the unit fails. More importantly, it creates a serious risk of electrical faults, potential fires, and refrigerant leaks, all of which are harmful to your family and the environment.
Understanding the Licences That Matter
When you hire a technician in NSW, you need to verify they hold two specific, non-negotiable licences.
First is the ARCtick Refrigerant Handling Licence, issued by the Australian Refrigeration Council. This proves the technician is legally qualified to handle refrigerant gases safely and prevent environmental damage. Without this, they're breaking federal law.
Second is a valid NSW Electrical Licence. Any work connecting the air conditioner to your home's power supply must be done by a licensed electrician to comply with Australian Standards, specifically AS/NZS 3000 for electrical wiring. This is what ensures the connection is safe and won't overload your circuits.
A professional installer carries both of these licences. Always ask to see them before any work begins. It’s the simplest way to protect your investment, your warranty, and your home’s safety.
The True Cost of Cutting Corners
A cheap, unlicensed installation almost always costs you more in the long run. We see it all the time in homes from the Central Coast to Sydney. Improperly installed units run inefficiently, leading to significantly higher energy bills. They often suffer from poor performance, strange noises, and premature breakdowns because of incorrect pipework or dodgy electrical connections. You can explore our guide on finding a qualified professional for your split system installation near you to make sure you're hiring a certified expert.
The popularity of split systems has soared, with sales in Australia jumping from just over one million units in 2015 to nearly 1.5 million by 2022. That's a 33% increase, reflecting just how efficient and affordable they are for Australian homes. While installation costs for a standard unit range from $600 to $1,500, that investment ensures the job is done right.
It's also interesting to see how specialised services like HVAC SEO strategies help reputable, licensed companies stand out so customers can find them easily.
Ultimately, hiring a dual-licensed professional is the only way to guarantee a safe, compliant, and efficient system that will keep you comfortable for many years to come.
What to Expect on Installation Day
So, the big day is here. Our technicians have arrived, and you’re about to get your new air conditioner. Knowing what actually happens next can make the whole process feel much smoother. A professional installation isn't about rushing; it’s about precision, safety, and setting your system up for a long, efficient life.
From the moment we step inside, our goal is to get the job done right with as little disruption to your home as possible. This isn't a DIY manual, but it will give you a clear picture of what a quality installation looks like from start to finish. You’ll see our licensed techs take a methodical approach, ensuring every component is perfectly placed, connected, and tested. We treat your home with respect, from laying down drop sheets to cleaning up thoroughly when we’re done.
The Initial Walk-Through and Positioning
First things first, we'll do a quick walk-through with you. We want to confirm the agreed-upon locations for the indoor and outdoor units and make sure nothing has changed. It's a final check to ensure everything still makes sense.
For the indoor unit, this means finding a spot high on the wall with clear, unobstructed airflow. The goal is to cool or heat the room as evenly as possible, so we avoid placing it directly above a big piece of furniture or where a curtain will immediately block the air.
For the outdoor unit, we’re looking for a stable, level surface, usually a concrete slab or sturdy wall brackets, with plenty of ventilation. Think of a typical installation in a Lake Macquarie home; we'd position the condenser away from bedroom windows to keep noise to a minimum and ensure it has enough clearance from fences or plants to "breathe." This positioning is fundamental to how well your system performs.
Core Work: The Drilling, Piping, and Draining
Once the locations are locked in, the main work begins. This involves drilling a small, neat core hole through the wall, which is the lifeline between the indoor and outdoor units. Through this hole, we'll run the insulated copper piping for the refrigerant, the electrical wiring that powers the indoor unit, and the condensate drain line.
One of the most critical parts of the job is managing that condensate drain. This small pipe's only job is to safely carry away the moisture the indoor unit pulls from the air. We make absolutely sure it has a continuous downward slope. If it doesn't, you risk blockages or water backing up into your home, a surprisingly common issue with rushed or shoddy installations.
For a comprehensive look at what quality installations involve on the coast, check out our guide to Central Coast air conditioning installation.
The following graphic breaks down the simple but crucial steps you should take to make sure you’re hiring a fully licensed and compliant professional.

This visual guide reinforces that verifying both the ARCtick and NSW electrical licences is a non-negotiable first step before hiring any installer.
The Final Commissioning Process
After everything is connected and in place, we move to the final and most technical stage: commissioning. This is what truly separates a professional job from a risky shortcut.
Commissioning isn't just about flicking a switch. It's a meticulous process of pressure testing the refrigerant lines for leaks, using a vacuum pump to remove all air and moisture from the pipes, and then releasing the refrigerant into the system. This step is absolutely vital for efficiency and longevity.
Skipping or rushing this process is a recipe for disaster. Even a tiny amount of moisture left in the lines can lead to internal corrosion and eventual system failure.
Once the system is properly charged, we’ll fire it up and run a series of tests. We'll check that it’s cooling and heating correctly, that the airflow is strong, and that the drain is working as it should. Finally, we’ll walk you through the remote control and answer any questions you have, making sure you're completely comfortable with your new air conditioner.
Choosing Smart Locations for Your Indoor and Outdoor Units
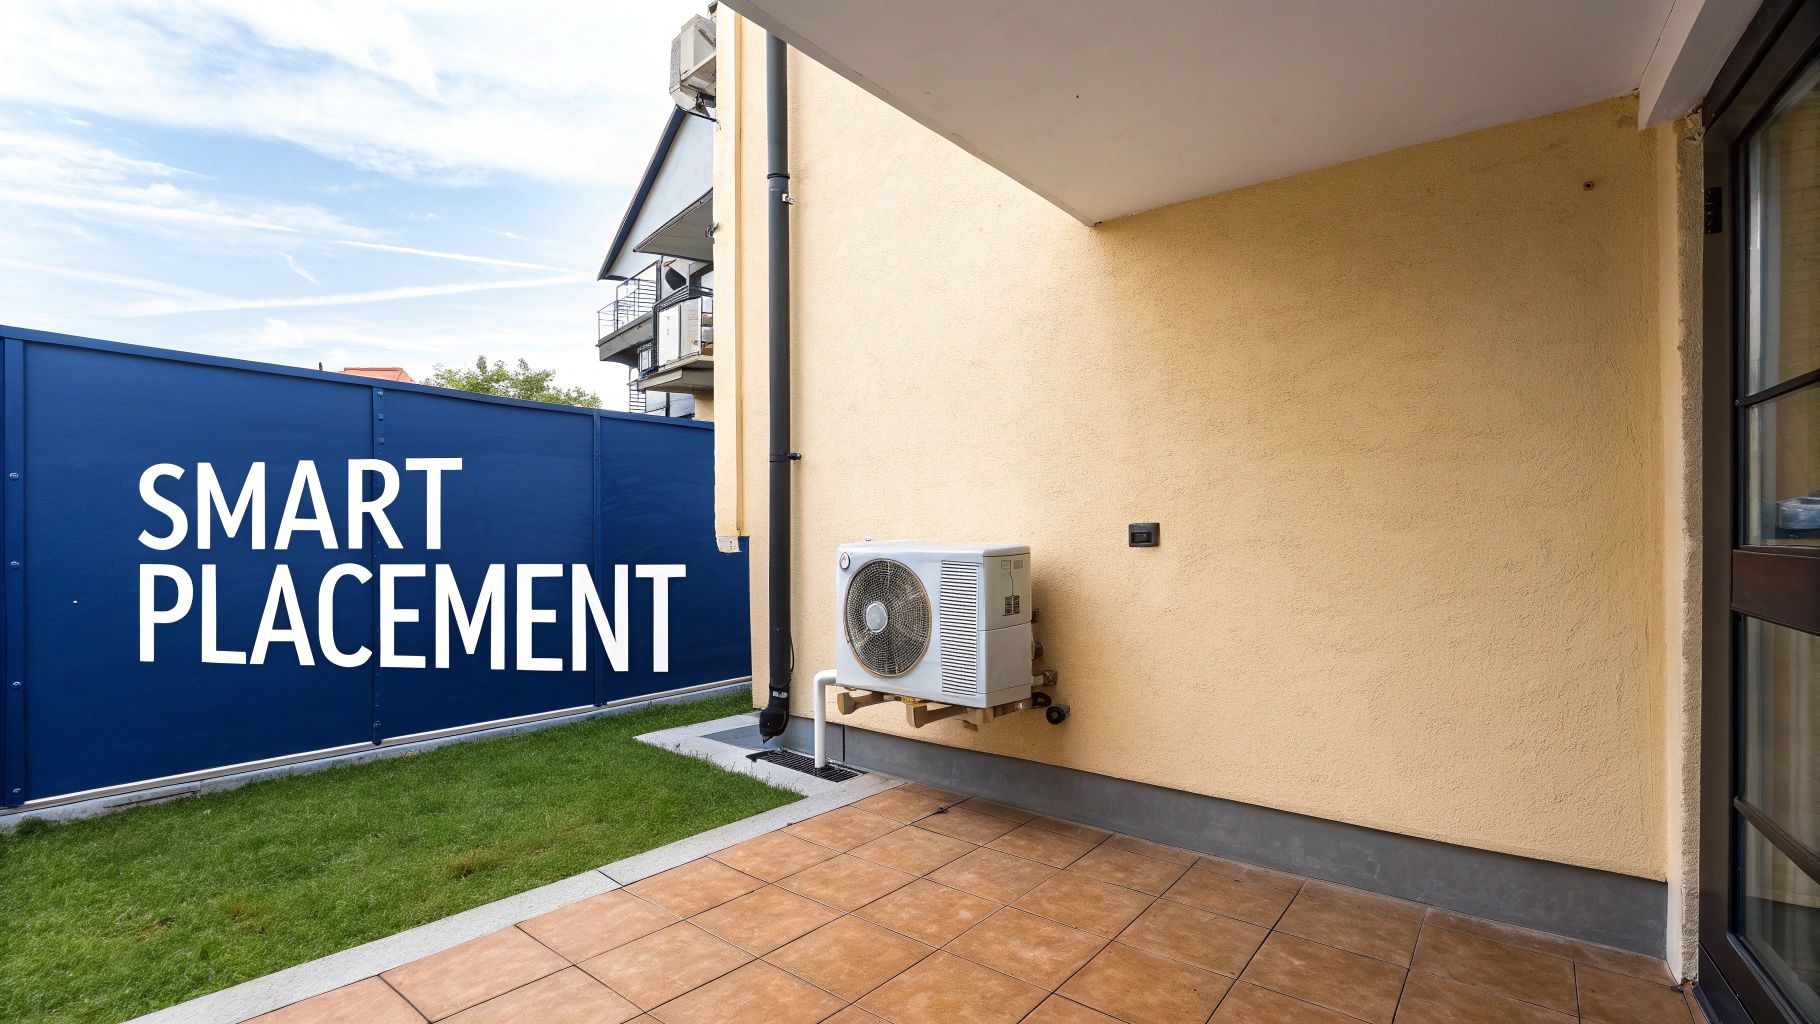
Where you place the two halves of your split system is easily one of the most critical decisions in the entire installation process. It's a choice that directly affects how well your unit performs, how much it costs you in power bills, and even how quiet your home is.
Getting this right isn't just about finding a bit of empty wall space. It’s about understanding airflow, efficiency, noise, and the long-term health of your system. A common mistake we see is people thinking any wall will do, but the reality is far more nuanced.
Let's walk through the key things we look at for both the indoor and outdoor units, so you can see why professional placement makes such a difference.
Positioning the Indoor Head Unit
The indoor unit, or the 'head unit', is what delivers all that lovely cool or warm air into your room. For it to do its job well, it needs a clear, unobstructed path.
Ideally, we mount the indoor unit high on a central wall. This spot allows the cooler, denser air to fall and circulate evenly across the space, pushing warmer air up and out of the way. We always try to avoid placing it directly over your bed or your favourite spot on the sofa; while it might seem logical, having a constant stream of air blowing on you gets uncomfortable fast.
We also have to think about heat sources. If you place the unit too close to a doorway that's always open, or right above a big-screen TV that pumps out heat, you'll confuse its thermostat. The unit will think the room is warmer than it is, forcing it to work overtime and driving up your energy bills for no good reason.
For homes in coastal spots like Newcastle or the Central Coast, we even factor in the salty sea breeze. If possible, we’ll position the unit away from windows that are often open to the sea, which helps protect its internal parts over the years.
Finding the Right Home for the Outdoor Condenser Unit
The outdoor unit, or condenser, is the real workhorse of your air con system. Its job is to expel all the heat it has pulled from inside your home, and it needs the right environment to do that efficiently. The three big factors here are ventilation, shade, and noise.
The outdoor unit needs to breathe. Restricting its airflow by boxing it into a tight corner or letting shrubs grow over it is like making a marathon runner breathe through a straw. It will struggle, overheat, and eventually fail.
We always make sure there’s plenty of clearance around the unit, sticking to the manufacturer’s specific guidelines. This lets it pull in and push out air freely, keeping it running at its best.
Shade is another massive help. An outdoor unit stuck in the blazing afternoon sun, especially in hot suburbs across Western Sydney, has to work much harder to get rid of heat. Just by placing it on a shaded side of the house, we can significantly boost its efficiency and cut your running costs.
Finally, there’s noise. While modern inverter systems are impressively quiet, the condenser still has a fan and a compressor. Imagine you live in a Sydney terrace with a small courtyard. We’d work with you to find a spot that keeps noise to a minimum for both you and your neighbours, maybe by using wall brackets or tucking it away from your outdoor entertaining area.
It's all part of being a good neighbour while making sure your system works flawlessly. This careful planning is what separates a quick job from a professional installation that will keep you comfortable for years to come.
Deciding where each part of your split system goes is a balancing act. The table below breaks down the main things to keep in mind for each unit to ensure you get the best possible performance.
Indoor vs Outdoor Unit Placement
| Consideration | Indoor Unit (Head Unit) | Outdoor Unit (Condenser) |
|---|---|---|
| Airflow | Mount high on a central wall for even air distribution. Avoid obstructions like furniture or curtains. | Requires ample clearance on all sides for ventilation. Avoid enclosed spaces or overgrown vegetation. |
| Efficiency | Keep away from heat sources (e.g., TVs, direct sunlight, kitchen appliances) that can confuse the thermostat. | Place in a shaded, cool spot to reduce workload. Avoid direct afternoon sun exposure. |
| Comfort | Avoid positioning where air blows directly onto people (e.g., over a bed or couch). | Position away from bedrooms, patios, and neighbours' windows to minimise noise disruption. |
| Drainage | Must have a slight downward slope to allow condensation to drain away properly without leaking. | Needs a stable, level base (concrete slab or brackets) to prevent vibration and ensure proper operation. |
| Aesthetics | Place where it is least obtrusive but still effective. Consider symmetry and visual balance in the room. | Tuck away in a less visible location, like the side of the house, without compromising on airflow. |
Ultimately, the goal is to find a home for each component that lets it do its job perfectly without getting in your way. A little bit of thought here goes a long way towards a system that runs efficiently and keeps you comfortable for over a decade.
Breaking Down Split System Installation Costs
Let's talk money. When you’re budgeting for a new air conditioner, the price you see on the unit at Harvey Norman is just the starting point. The real, all-in cost of getting a split system installed is a mix of the unit itself, the skilled labour to fit it, and a few other bits and pieces that depend on your specific home.
Getting your head around these factors helps you budget properly and, just as importantly, spot a quality quote from one that’s too good to be true. A suspiciously cheap quote often means corners are being cut, leading to expensive problems down the track. Think poor workmanship, refrigerant leaks, or an inefficient system that absolutely hammers your power bills. A fair, professional quote should be transparent, with no nasty surprises.
The Core Components of Your Quote
Every professional installation quote is built around a few key, non-negotiable elements. These form the baseline of the final price you’ll pay.
First up is the cost of the air conditioning unit itself. This varies massively depending on the brand, the capacity (measured in kW), and its energy efficiency rating. A high-efficiency 2.5kW unit perfect for a bedroom is naturally going to cost less than a powerful 8kW system designed to cool a big, open-plan living area in a Sydney home.
Then you’ve got the cost of labour. This isn’t just about the time our techs spend at your house. It covers the expertise of a dual-licensed team (electrical and refrigeration), their insurance, and all the specialised tools needed for a safe, compliant job. A standard, straightforward installation will always have a lower labour cost than a complex one.
The most common and cost-effective scenario is a "back-to-back" installation. This is where the indoor unit is mounted on a wall, and the outdoor unit sits directly behind it on the other side of that same wall. Jobs that need extra piping or tricky access will naturally increase the labour component of the quote.
Factors That Influence the Final Price
Beyond the unit and the basic labour, several other factors can bump up the total cost. A good installer will spot these during their site visit and include them clearly in your quote, so you know exactly what you’re paying for.
One of the most common extras is a dedicated electrical circuit. Modern air conditioners are power-hungry and, under Australian Standards, they need their own circuit running from your switchboard to operate safely. If your home doesn’t have a spare one, a licensed electrician will need to install it.
Other potential costs you might see on a quote include:
- Wall brackets for mounting the outdoor condenser unit if you don’t have a suitable concrete slab on the ground.
- Extra piping and cabling for non-standard installs where the indoor and outdoor units are far apart.
- Condensate pumps if the drain line can't use gravity to get rid of the moisture the unit collects.
- Council permits or strata approvals, which can sometimes be required in specific Sydney or Newcastle council areas.
The Australian split air conditioner market is booming, and installation costs for most residential units land somewhere between $1,500 and $6,000. It's a significant investment, but making smart choices, like opting for a high-efficiency model, can slash your running costs by 20-50%, making it pay for itself over time.
When you're working out what to spend, it can be helpful to see how these figures stack up against other household systems. Some people find it useful understanding the installation costs for other major home air systems to get a wider perspective. For a more detailed look at this specific topic, check out our in-depth guide to split system air conditioning installation costs.
At the end of the day, a transparent, detailed quote is the hallmark of a trustworthy installer who values quality and safety over just being the cheapest.
Common Questions We Get About Split System Installations
Over the years, we've installed thousands of split systems across the Central Coast, Sydney, and Newcastle. Homeowners, property managers, and small business owners tend to ask the same handful of really practical questions about what the process actually involves.
To save you some time and clear up any confusion, here are the answers to the questions we hear most often.
How Long Does a Split System Installation Actually Take?
This is usually the first thing people ask. For a straightforward 'back-to-back' installation, where the indoor and outdoor units are on opposite sides of the same wall, you can expect the job to take between three to five hours. That’s the simplest, quickest scenario.
Of course, not every home is built for a simple back-to-back setup. More complex jobs can easily take a full day, sometimes longer. Things that add time include tricky property access, needing to run extra piping through walls or ceiling cavities, or working on multi-storey properties in places like Sydney or Newcastle. We always give you a realistic schedule with our quote, so you know exactly what to expect.
Do I Really Need a Dedicated Electrical Circuit?
In nearly every single case, the answer is a firm yes. Modern split systems need their own dedicated circuit, running straight from your switchboard. This isn't just a suggestion; it's a critical safety requirement under Australian electrical standards (AS/NZS 3000, to be exact).
Trying to run a new air conditioner on a general power circuit is asking for trouble. It can cause overloads, trip your safety switches constantly, and even create a serious fire risk. A key part of any professional installation is having our licensed electrician assess your switchboard and install a new, dedicated circuit to handle the load safely.
Can I Get a Split System Installed in My Apartment?
You absolutely can, but there's a crucial first step: you'll almost certainly need permission from your body corporate or strata management. They have specific rules about where outdoor units can be placed to maintain the building's appearance, manage noise, and ensure everything is compliant.
Before you even think about getting a quote, check your strata by-laws and get that application for approval submitted. We’ve worked with strata requirements all over Sydney and the Central Coast and can provide all the system specs and documents you need to help your application go smoothly.
What's a "Back-to-Back" Installation?
This is the industry term for the simplest and most common type of install. The indoor unit is mounted on an external wall, and the outdoor condenser is placed directly behind it on the ground or on wall brackets. The piping and electrical lines just run straight through the wall to connect them.
What Makes an Installation "Complex"?
Anything that isn't a simple back-to-back setup falls into the "complex" category. This could mean putting the outdoor unit on a roof, on a balcony far from the indoor unit, or even on the other side of the house. These jobs require much longer pipe runs and more involved electrical work.
A classic example is a terrace house in a Sydney suburb like Paddington. To comply with heritage rules or minimise noise for the neighbours, the outdoor unit often has to go on the roof. That requires very careful planning for piping, drainage, and safe access, which naturally adds to the time and cost.
What Happens to the Wall After You Drill a Hole Through It?
A professional job is a tidy job. We take great care to make sure everything is sealed up neatly. The core hole we drill for the pipes and cables gets sealed from both the inside and the outside to stop drafts, moisture, and pests from getting in.
On the inside, we use a neat wall cap or cover plate that sits flush against the wall where the pipes feed into the indoor unit. Outside, the hole is sealed with a high-quality, weatherproof sealant. When we're done, it should look clean and professional, as if it was always meant to be there.
How Much Maintenance Will It Need After It's Installed?
Once your system is up and running, a little regular maintenance goes a long way. The single most important thing you can do yourself is clean the filters inside the indoor unit every few months. Clogged filters kill airflow, slash performance, and drive up your power bills.
Beyond that, we strongly recommend a professional service every 12 months. This check-up ensures the refrigerant levels are correct, the coils are clean, and all the electrical connections are secure. For a full rundown, you can read our guide on split system maintenance and when to call a pro. This simple yearly visit can prevent major breakdowns and easily extend the life of your investment.
Ready to enjoy reliable, year-round comfort in your home or business? The team at ALC Air has over 15 years of experience providing professional and compliant air conditioning installations across the Central Coast, Sydney, Newcastle, and Lake Macquarie. Get in touch today for expert advice and a free, no-obligation quote. https://alcairconditioning.com.au